How to upload HTML/PHP file from cPanel?
Do you want to upload html/php file? If yes then you can do that just after reading this complete article.
Let’s move on…
Upload HTML/PHP file using cPanel :
You just need to follow some simple steps as mentioned in this article.
Alright!
STEP 1 – Login To cPanel Account
- Go to NinzaHost.
- Login your Account.
- Select your Active Product/Services.
- Click on “Login to cPanel” under Action Tab.
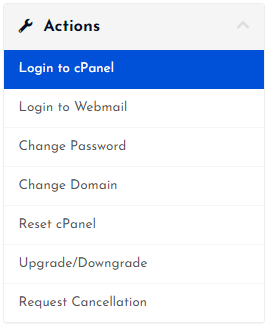
- Then you will automatically redirected to your cPanel Account.
Or, If you have cPanel login details then you can easily login to your cPanel account by visiting yourdomain.com/cpanel.
STEP 2 – Go To File Manager
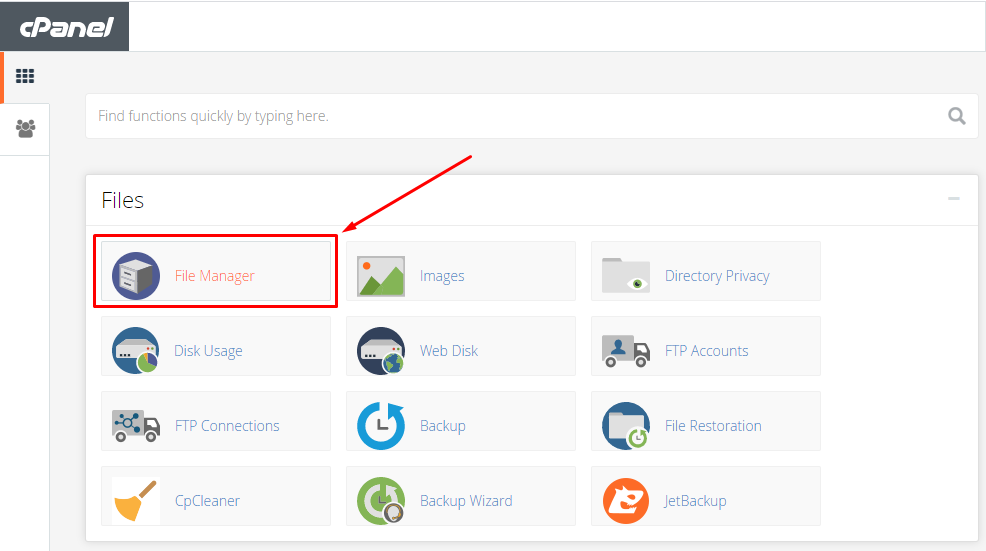
- Search “File Manager” in the search bar.
- Or, Look at the first one that is it.
- Click on the File Manager.
- Now, Click on “public_html” folder.
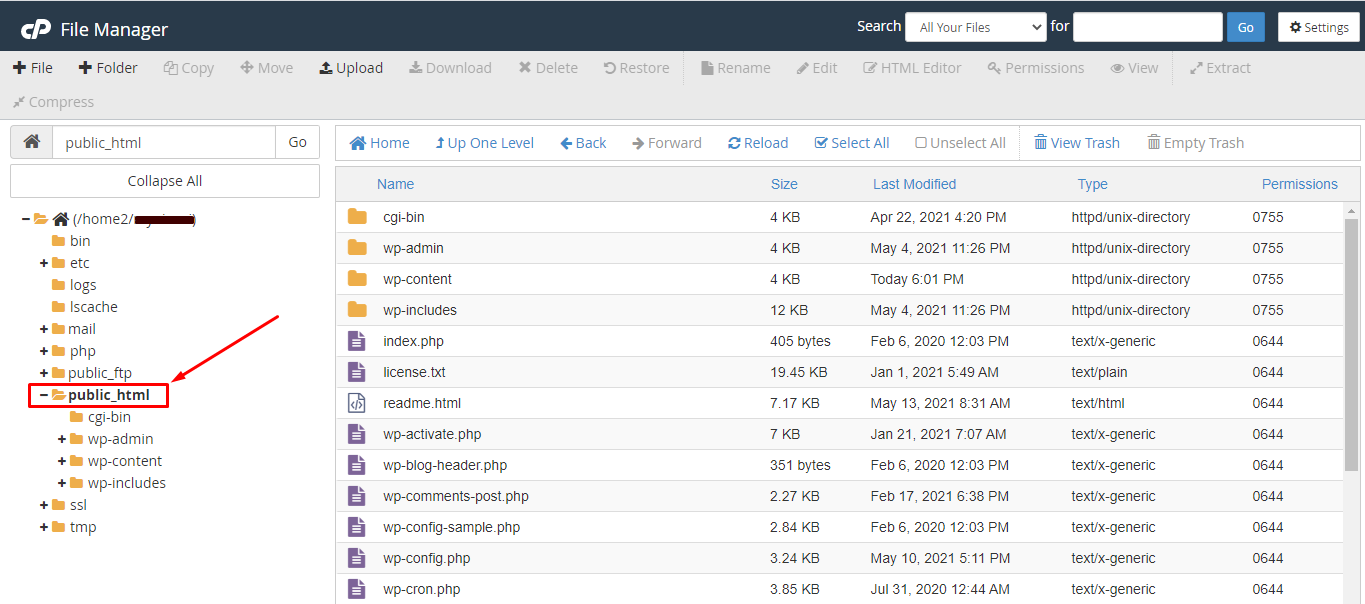
If you have installed WordPress then you will see some folders along with the files.
If you haven’t installed WP then it looks empty.
Note : You can also upload your html/php file under “public_html” directly but for testing we’ll create a TEST folder then upload under “public_html/test”.
*OPTIONAL*
- Click on “➕ Folder” button.
- Name your folder. For e.g. ‘Test’
- Hit on “Create New Folder” button.
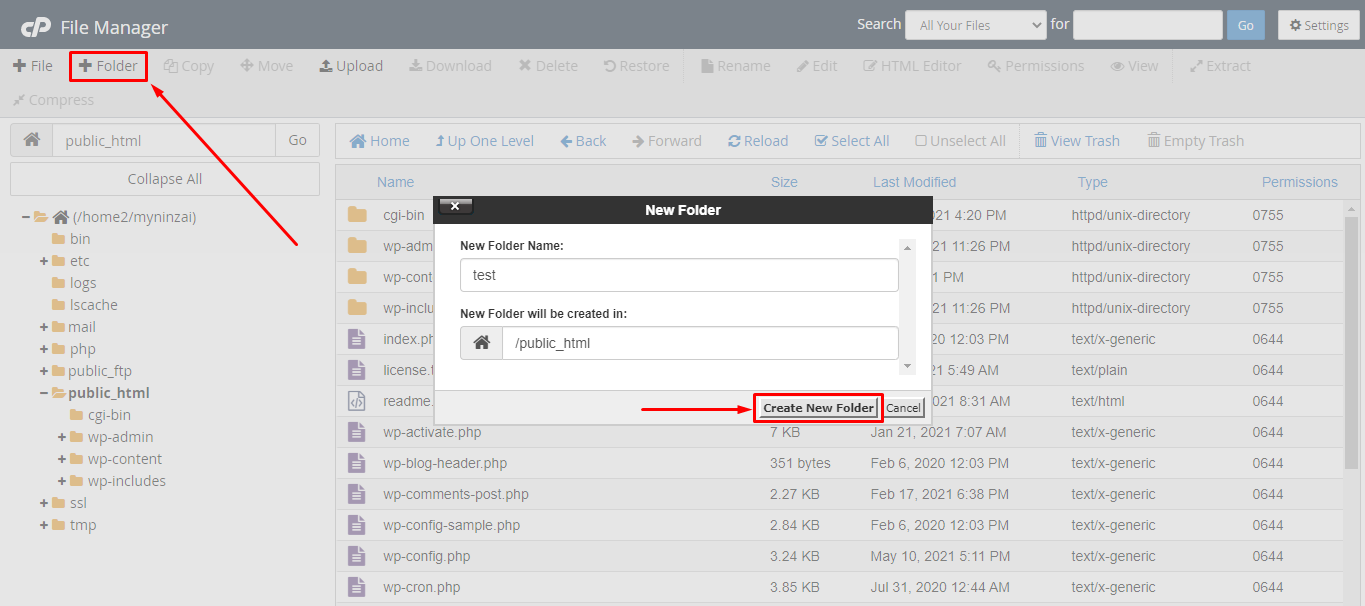
- Great, your folder is created.
STEP 3 – Upload HTML/PHP File
Open the folder where you want to upload the file either “public_html” or “public_html/test”.
- Click on the “UPLOAD” button.
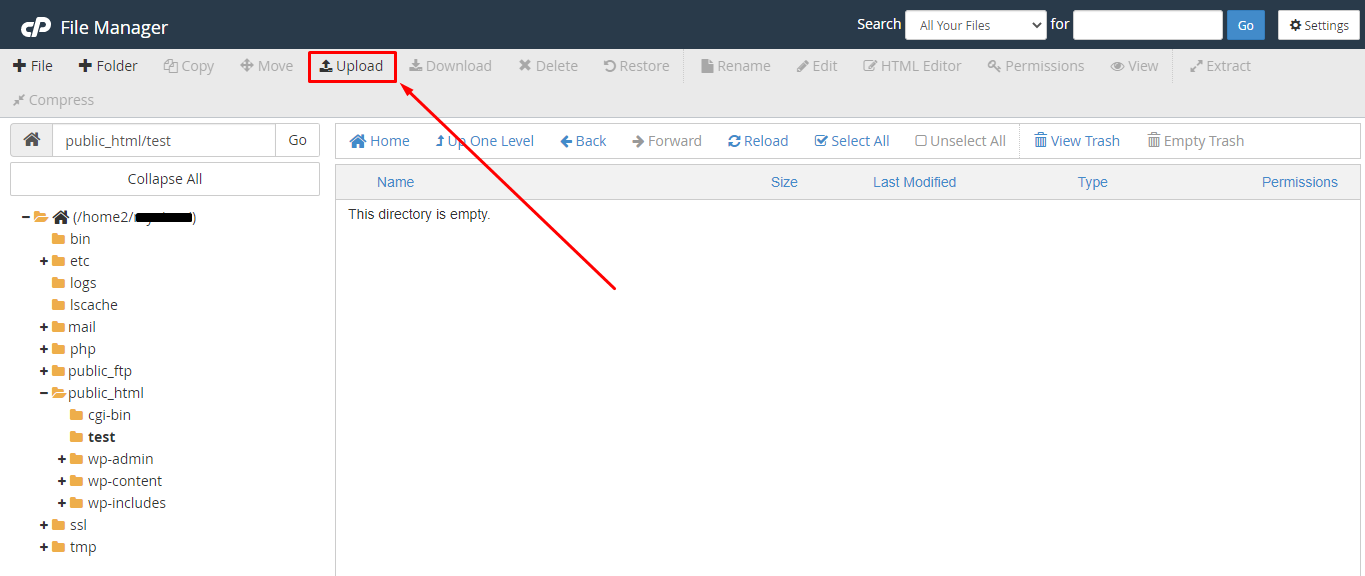
- You will be redirected to a new page.
- Now, Click on “Select File”.
- Or, Drag your file directly.

- Wait until the upload gets done.
- Then, click on “Go Back” button.
- Done! It’s time to check.
As you know, we’d created a TEST folder then uploaded my html file named “hello-world”.
So, here it is…
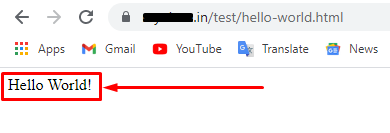
- That’s it.
Hope your query regarding how to upload html/php file is now solved.
If you still have any issue then please don’t forget to comment down your problems or query.






Leave a Comment