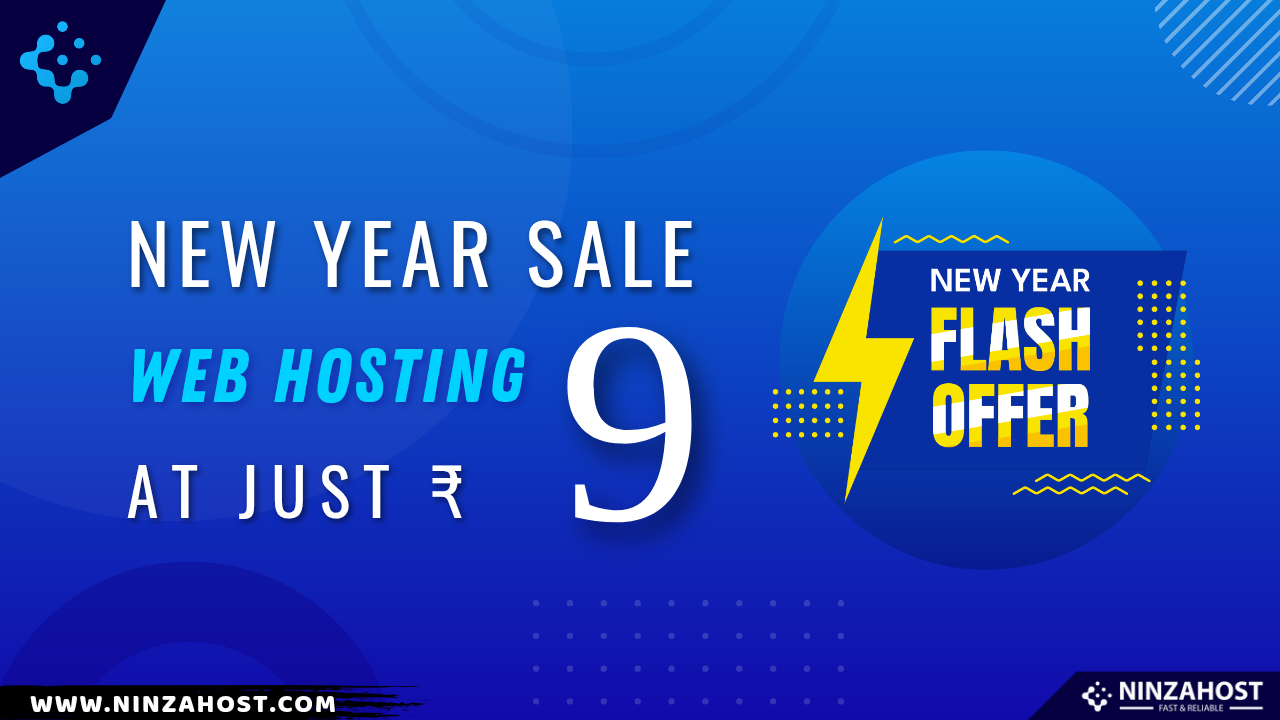
New Year Sale: Web Hosting at just Rs. 9
Are you ready to kickstart the New Year with your own website? If so, you’re in the right place!
In this article, you’ll discover how you can take full advantage of NinzaHost’s New Year Sale to set up your WordPress site quickly and easily.
Without further ado, let’s dive into how you can get started!
Start the New Year with a New Website: NinzaHost New Year Sale
Ready to create your website in 2024? With NinzaHost’s New Year Sale, you can get 1-year hosting for just Rs. 9! It’s an incredible deal for anyone starting a blog, business, or portfolio site.
Here’s How to Grab the Deal:
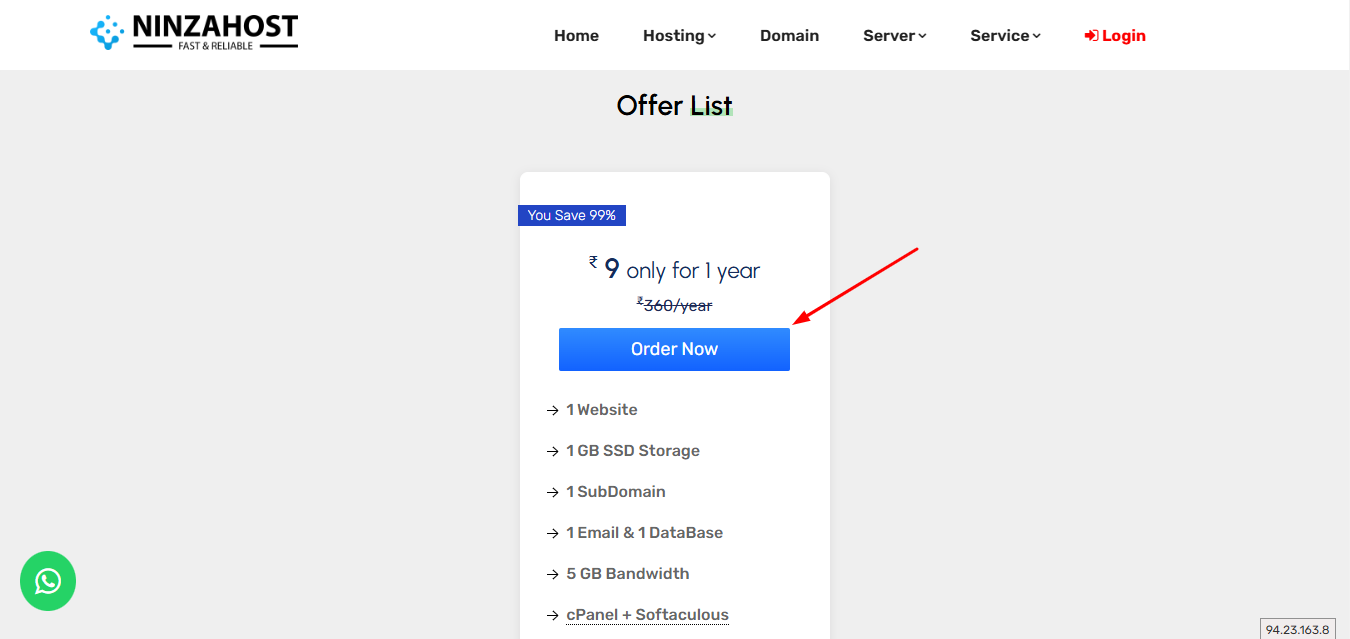
- Go to the NinzaHost New Year Sale page.
- Scroll down to the offer list section.
- Click on the Order Now button.
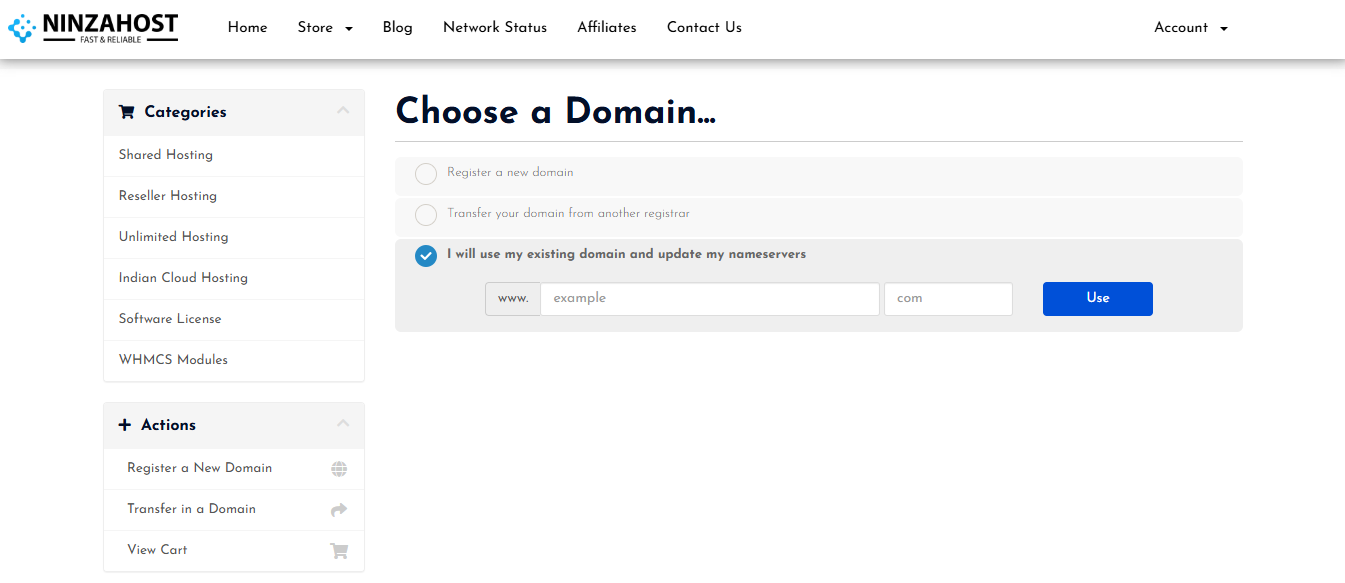
- Choose a domain.
- You can register a new domain, transfer your domain or can use your already registered one.
- Now click on the Checkout button.
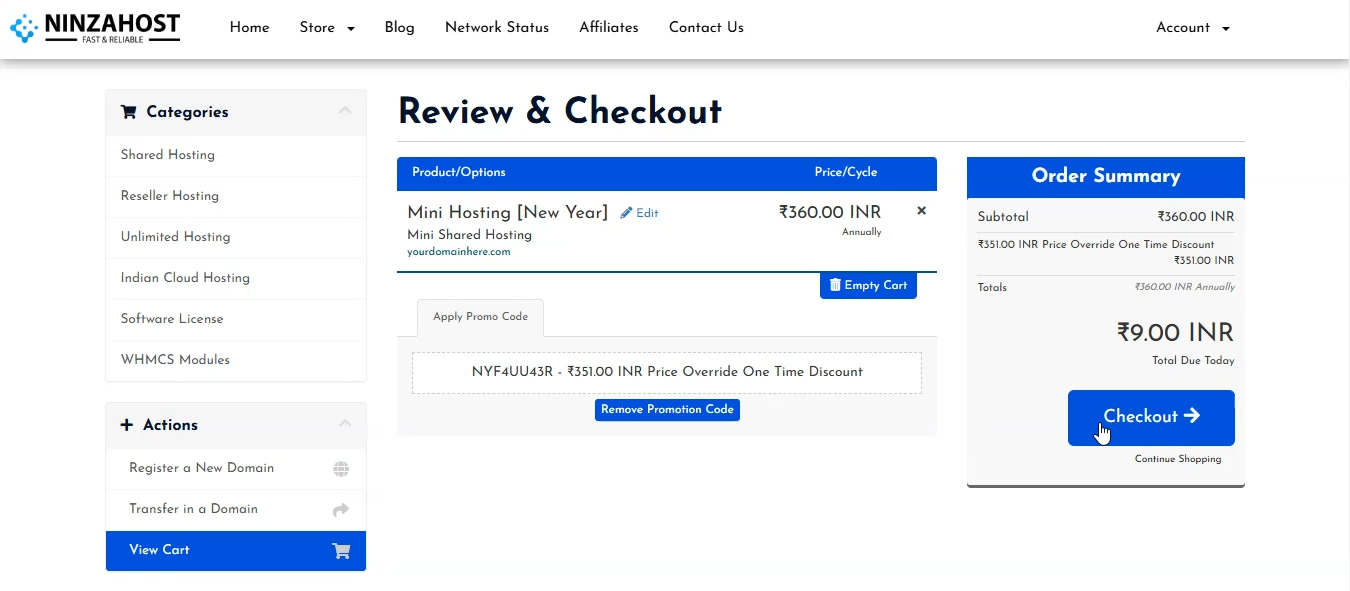
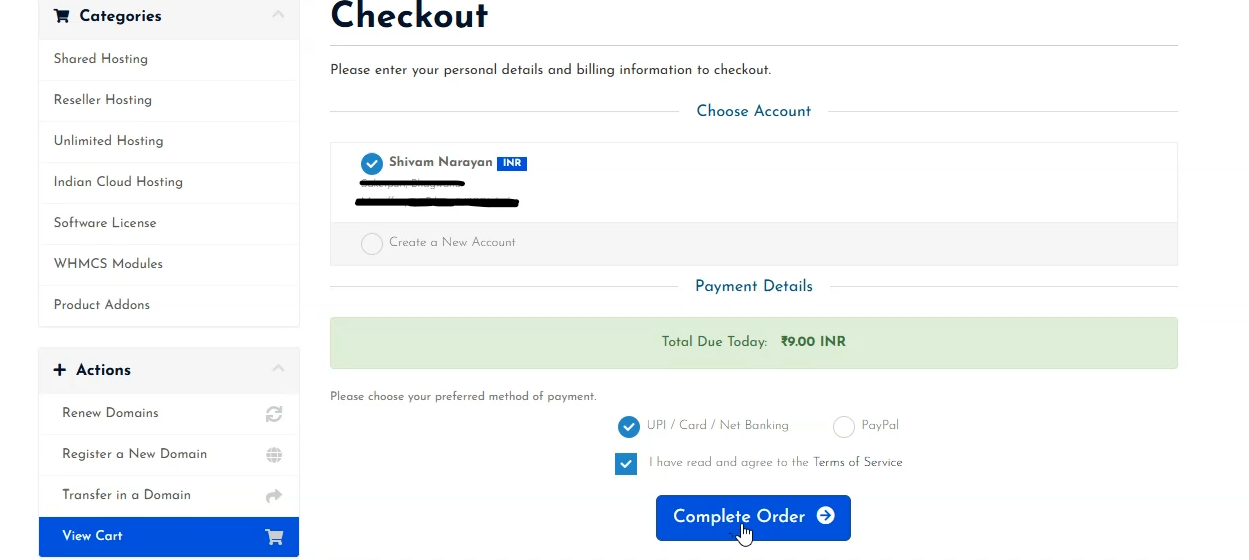
- Sign in or Sign up now.
- Fill up some details.
- Choose your preferred method of payment.
- Agree to the terms and service.
- Click on the Complete Order button.
- Your invoice will be generated.
- Simply, click on the Pay Now button and complete the payment.
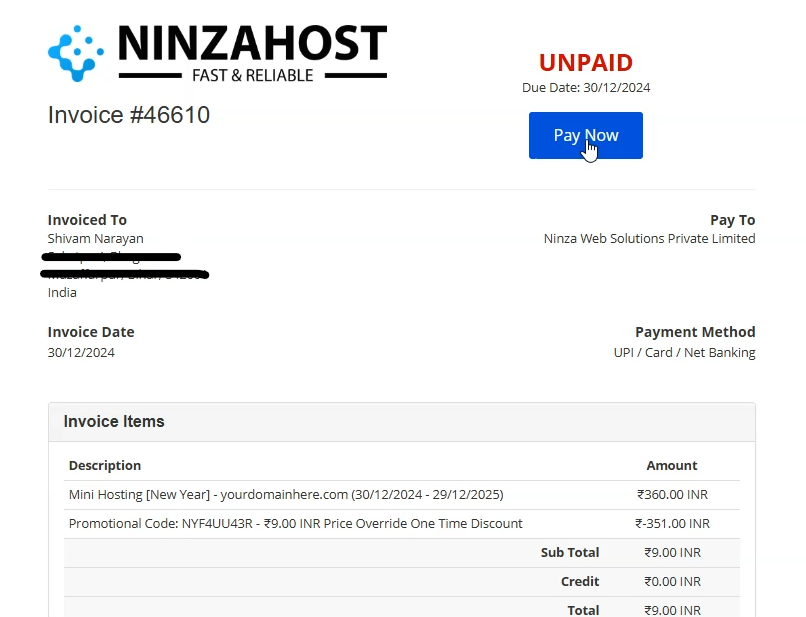
- That’s it, just complete the payment.
- Your web hosting will be ready.
Now, you may need to update the nameservers, if your domain is with us, you can follow this article: https://blog.ninzahost.com/change-your-domain-nameservers-in-ninzahost/
Once you’ve done that, you’re ready to start building your website!
Installing WordPress Using Softaculous
After purchasing your hosting, you can now set up WordPress. Fortunately, NinzaHost makes it easy with Softaculous, an auto-installer tool that helps you install WordPress in just a few steps.
STEP 1 – Login to cPanel Account
- Go to NinzaHost.
- Login to your Account.
- Select your Active Product/Services.
- Click on “Login to cPanel” under the Action Tab.
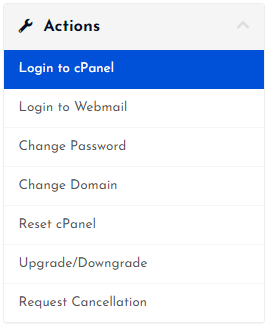
- Then you will automatically redirected to your cPanel Account.
Or, If you have cPanel login details, you can easily log in to your cPanel account by visiting yourdomain.com/cpanel.
STEP 2 – Go to Softaculous Apps Installer
- Search “Softaculous” in the search bar.
- Click on the “Softaculous Apps Installer”.

- Great! It’s time to install WordPress.
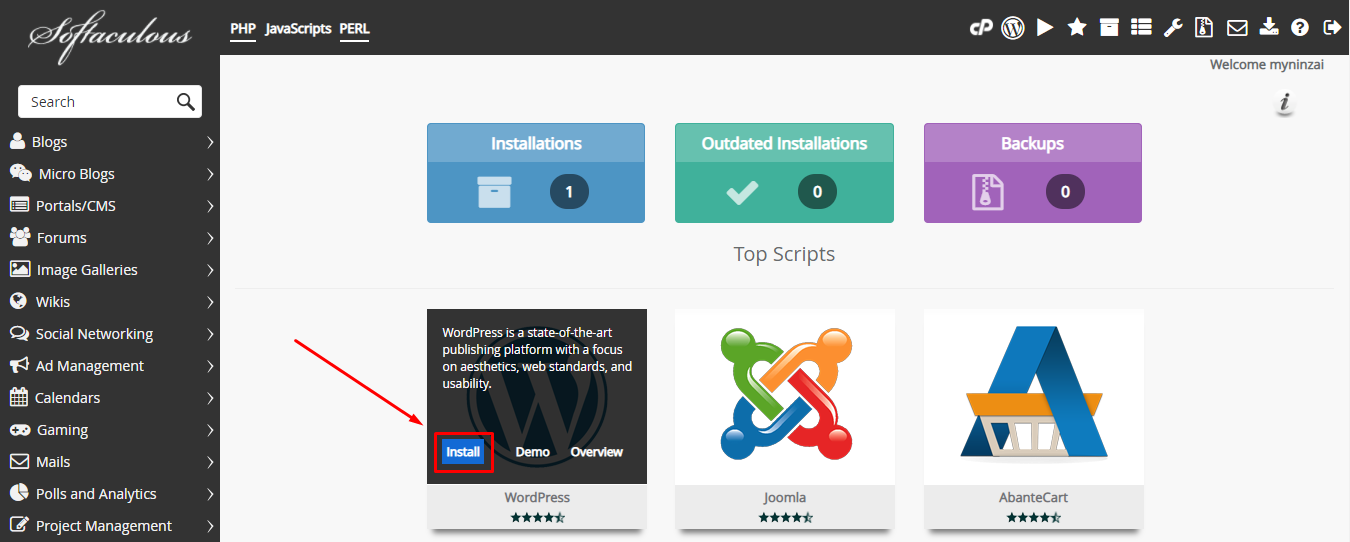
STEP 3 – Install WordPress Script
- Hover over WordPress under Top Scripts.
- Click on the “Install” button.
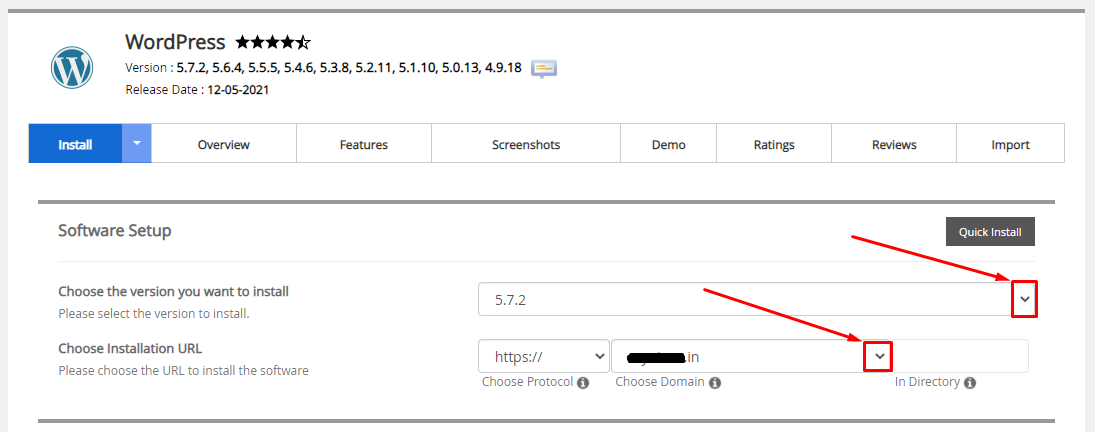
Now, you need to fill in some details like – Software Setup, Site Settings & Admin Account etc.
Under Software Setup :
- Choose the WordPress version to install.
- Choose the Domain on which you want to install WordPress.
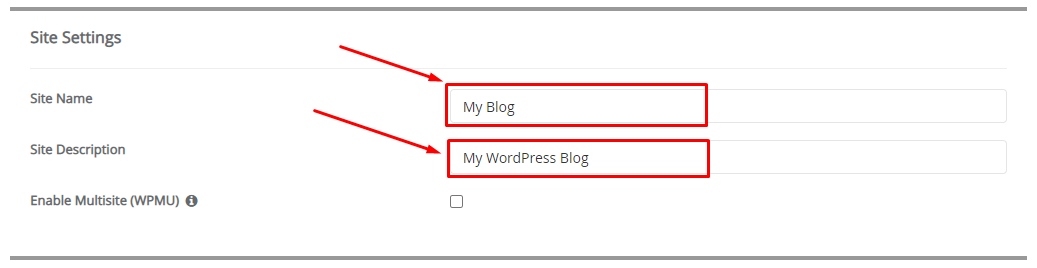
Under Site Settings :
- Give a suitable name for your website under “Site Name”.
- Write something about your site under “Site Description”.
- (WPMU) optional – not necessary.
Under Admin Account :
- Create an admin username.
- Create an admin password.
- Write an admin Email.
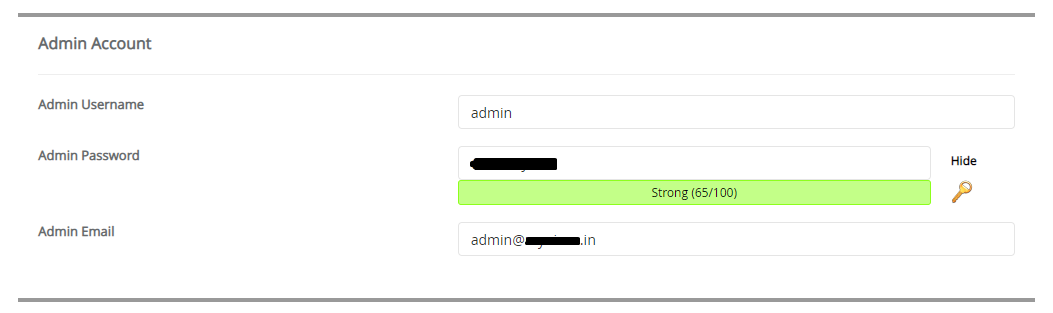
Note – Write the username & password in your Notepad since these are required to login into your WordPress Dashboard.
Under Choose Language :
- Select the preferred language for your website.
Now, there were some more optional settings, such as selecting some default plugins and choosing the theme.
- Enter your Email if you want installation details.
- At last, Click on the Install button.

- Now, wait for a few seconds.
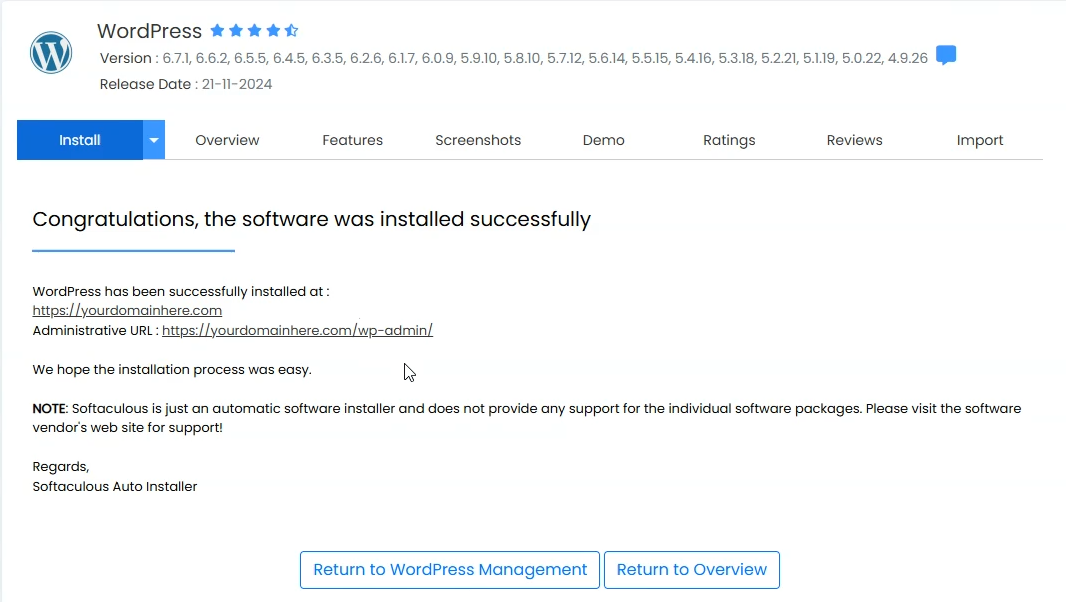
- Congrats! Your WordPress is now installed successfully.
Now that your WordPress site is up and running, you can start customizing it to fit your needs.
Don’t miss out on this fantastic opportunity to start your website with 1-year hosting for just Rs. 9. Take advantage of the New Year Sale now and make 2025 the year you bring your online vision to life!