
How to change PHP version using cPanel?
Do you want to change PHP version of your site?
Don’t worry!
It’s so simple, you can do this easily by just following the 3 steps mentioned in this article.
Let’s start the topic…
How to change PHP version of your site?
Don’t need to do much.
Just follow all these three steps and change your PHP Version.
STEP 1 – Login to cPanel Account
- Go to NinzaHost.
- Login your Account.
- Select your Active Product/Services.
- Click on “Login to cPanel” under Action Tab.
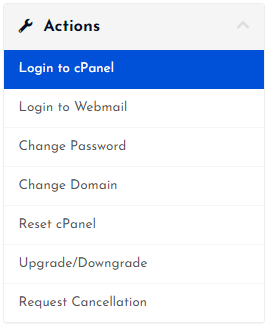
- Then you will automatically redirected to your cPanel Account.
Or, If you have cPanel login details then you can easily login to your cPanel account by visiting yourdomain.com/cpanel.
STEP 2 – Go to MultiPHP Manager
- Search “PHP” in the search bar.
- Click on the “MultiPHP Manager”.

- Done! Now, you just need to change the PHP version.
STEP 3 – Change PHP Version
Now, you just need choose your domain whose PHP version you want to change.
- Select the preferred Domain.
- Choose latest PHP version. (e.g. : ea-php74)
- Then, Click on APPLY button.
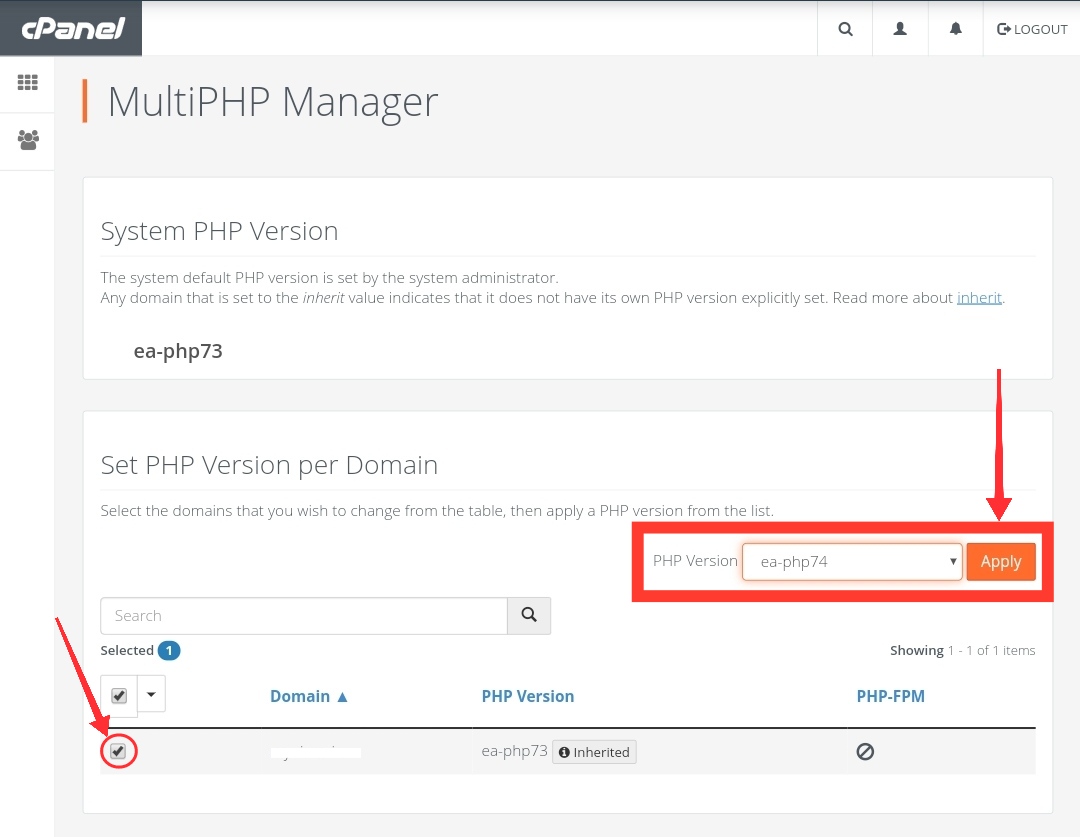
- Congrats! you have completed all the steps.
Now, you will see a success notification look like this :
 Hope, you have also successfully changed the PHP version of your site.
If you still have any issue then let us through the comment section.


Leave a Comment