How to setup Auto Renewal for Web Hosting?
Do you want to setup Auto Renewal for your web hosting services? If yes, this is the perfect article to show you the exact steps you need to do in order to turn on Auto Renewal feature.
Without wasting any sort of time, let’s directly move onto the topic…
Steps to setup Auto Renewal Feature :
You just need to follow these simple steps mentioned below to setup Auto Renewal Feature easily from your clientarea.
Here we go…
STEP 1 – Login To Your Client Area
- Go to NinzaHost.
- Click on Login button.
OR, Click here to go to Client Area login page.
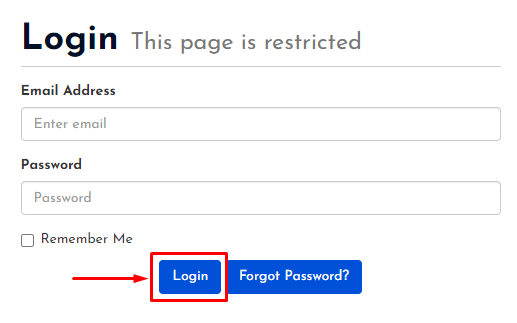
- Login your account with your Email & Password.
STEP 2 – Select Your Service
- Click on the Services option.
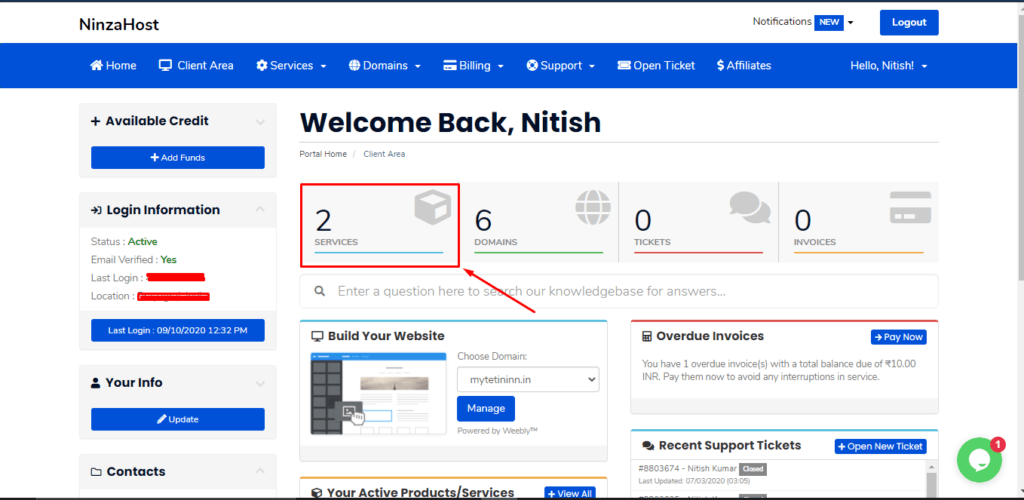
- Select any service where you want to setup Auto Renewal.
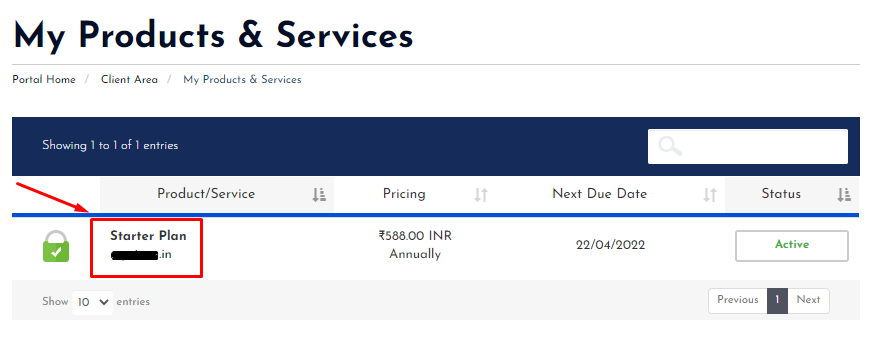
- Wait for few seconds until next page appears.
STEP 3 – Setup Auto Renewal Feature
- Scroll down to “Hosting Renewals” section.

- Now, you will get a popup like this:

- Just click on the “Confirm” button.
- All done, you will receive a success message.

- That’s it.
Thanks for reading this article. Hope, you found this article helpful and your query regarding how to setup auto renewal for web hosting is now solved.
If you still have any query or doubt then please let us know through your comments in the comment section below.

