How to scan your website for Virus or Malware?
Do you want to scan your website for virus or malware? If yes then don’t worry! Here you gonna learn the step by step process how you can easily scan your website.
You just need to follow all the steps mentioned in this article in order to scan your website for virus or malware.
Let’s move on to the topic…
Steps to scan your website for virus or malware :
Here we go with the very first step.
STEP 1 – Login To Your cPanel Account
- Go to NinzaHost.
- Login your Account.
- Select your Active Product/Services.
- Click on “Login to cPanel” under Action Tab.
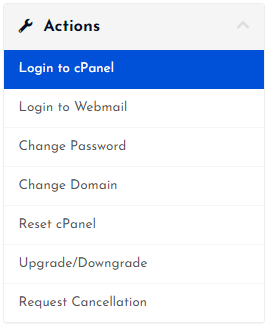
- Then you will automatically redirected to your cPanel Account.
Or, If you have cPanel login details then you can easily login to your cPanel account by visiting yourdomain.com/cpanel.
STEP 2 – Go To Virus Checker
- Search for “Virus” in search tab.
- Click on “Virus Scanner” under Advanced Tab.

- Virus Scanner page will appear.
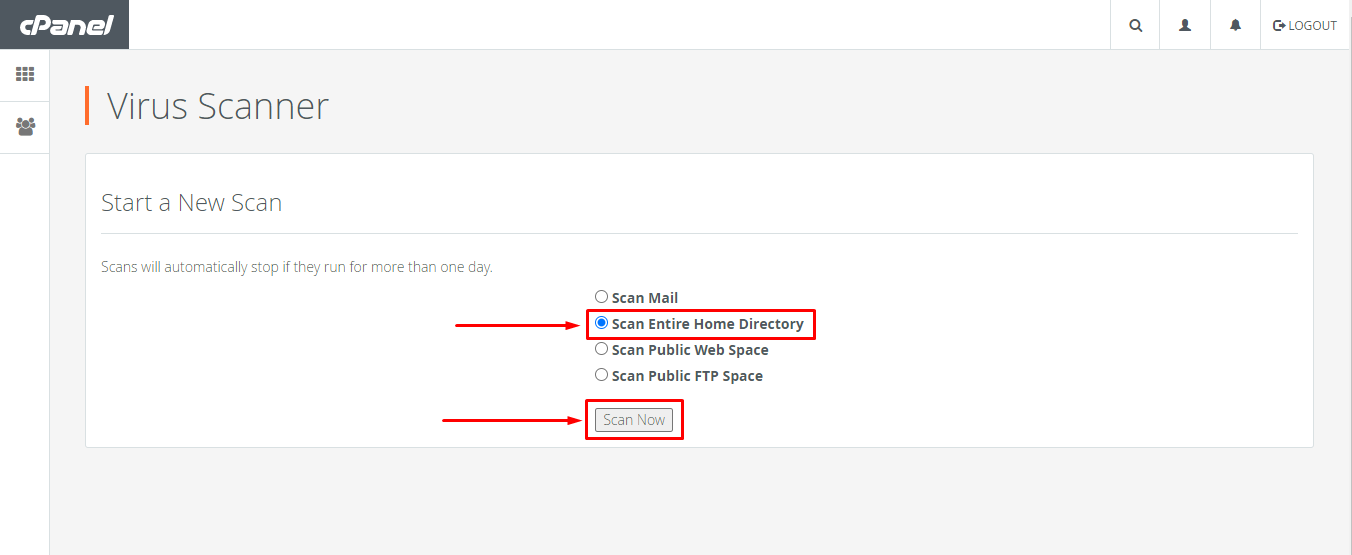
STEP 3 – Click on Scan Now
- You will get four different scanning options.

- It’s better to choose “Scan Entire Home Directory” but depends upon you.
- Then, click on “Scan Now” button.
- Now the scan will start automatically.
- As soon as, Scanner Progress reached 100% you will get a popup like this :

- It means your directory is totally safe.
- If in case, scanner found any virus then you can see those files under “Infected Files” tab as shown in the screenshot.

- All Done!
Hope you found this article helpful and your query regarding how you can scan your website for virus or malware is now solved.
If you still have any query or doubt then please let us know through your comments in the comment section below.


Leave a Comment