
How to transfer Domain from NameCheap to NinzaHost?
Do you want to transfer your domain name from NameCheap to NinzaHost? If yes then don’t worry, you can easily transfer domain name to NinzaHost after reading and following the steps mentioned in this article.
So without any further due, Let’s get started.
Steps to transfer Domain Name from NameCheap to NinzaHost :
You just need to follow this step-by-step tutorial to complete your domain transfer without having any issue.
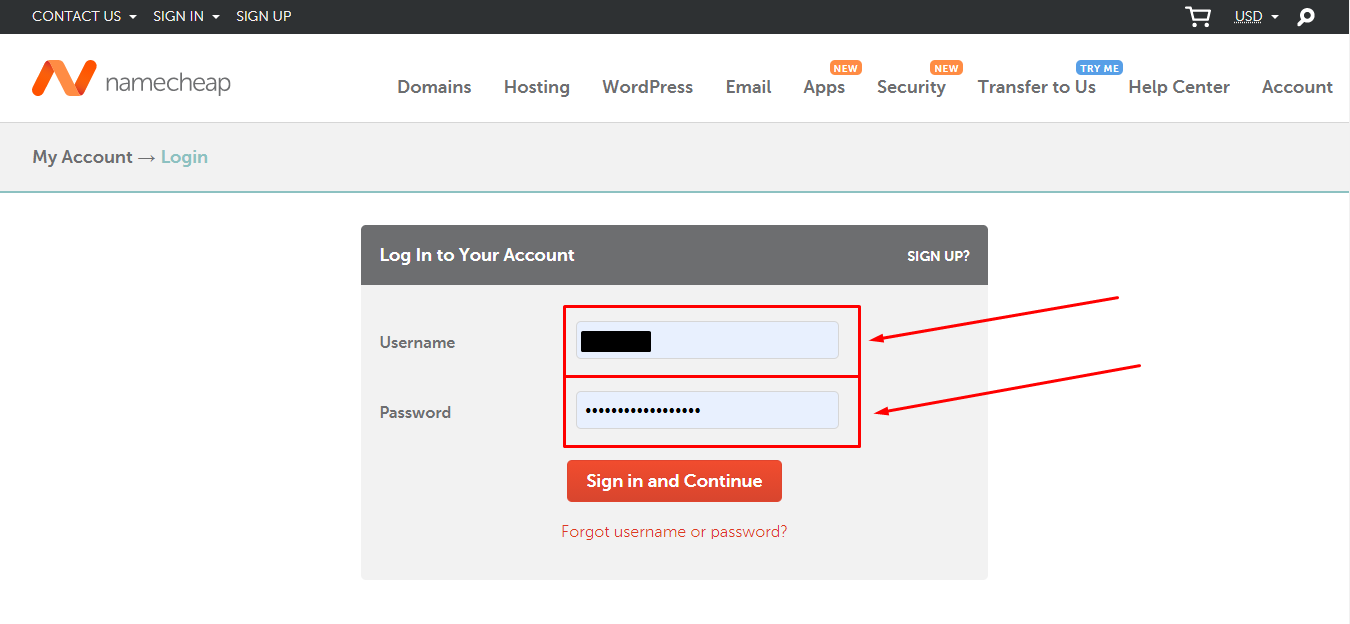
STEP 1 – Unlock The Domain Lock From NameCheap
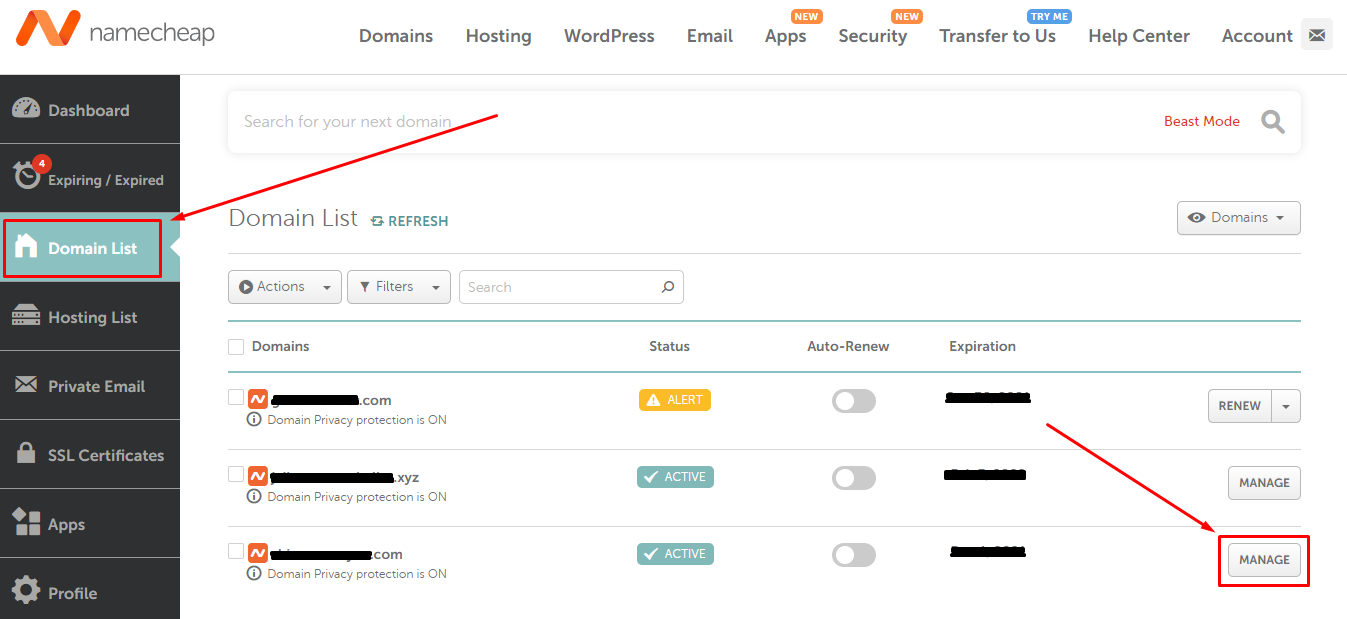
- Click on “Domain List” button present on left sidebar.
- Choose your Domain Name if have many.
- Click on “Manage” button of selected domain.
- Now, Click on “Sharing & Transfer” button.
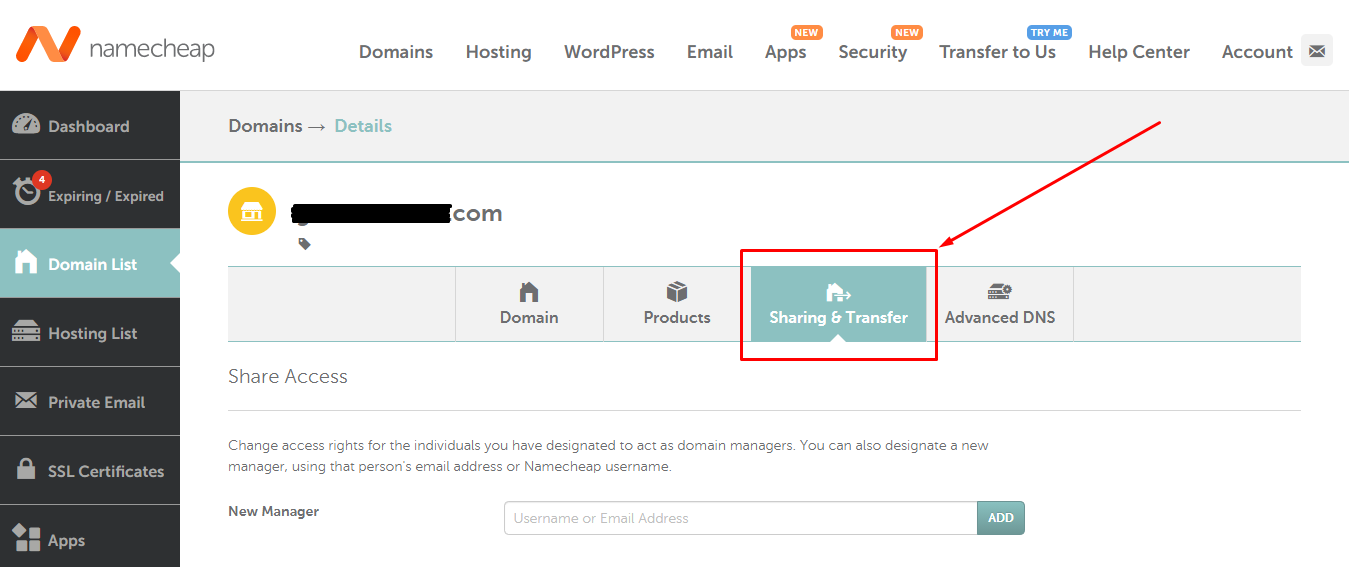
- Scroll down until the domain lock option shows.
- Click on “Unlock” button.
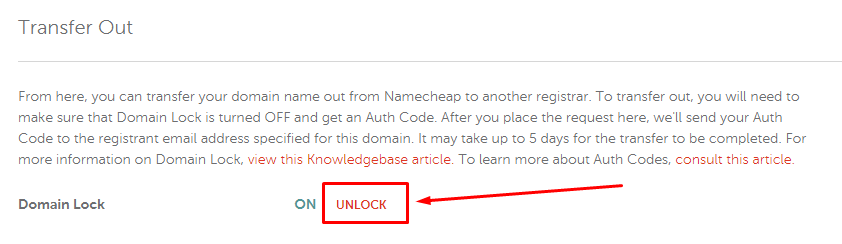
- Congrats, your domain is now unlocked successfully.
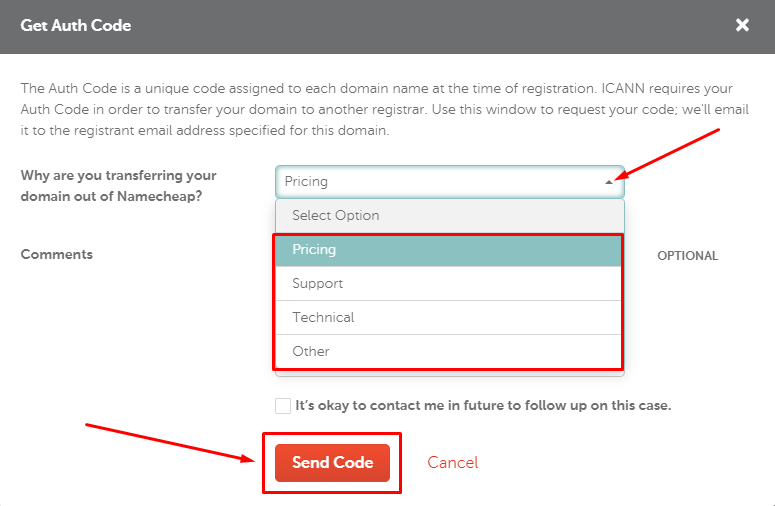
STEP 2 – Get The Auth Code
- Continue this after Step 1.
- Now, Click on “Auth Code” button.

- You will see a popup asking for reason.
- Select your transfer reason.
- Comments are optional so you don’t need to write anything.
- At last click on “Send Code” button.
- Done, you will receive the ‘Auth Code’ on your registered mail shortly.
- Check your registered mail.
- Copy the Authorization Code.
STEP 3 – Transfer Domain Name To NinzaHost
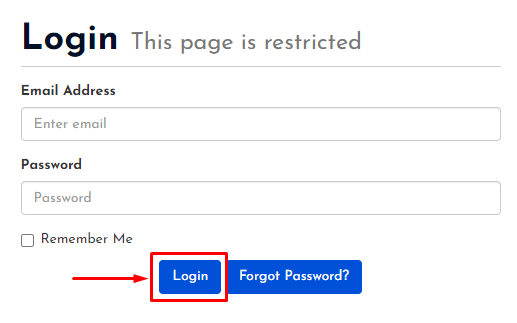
- Go to NinzaHost.
- Login to your Account.
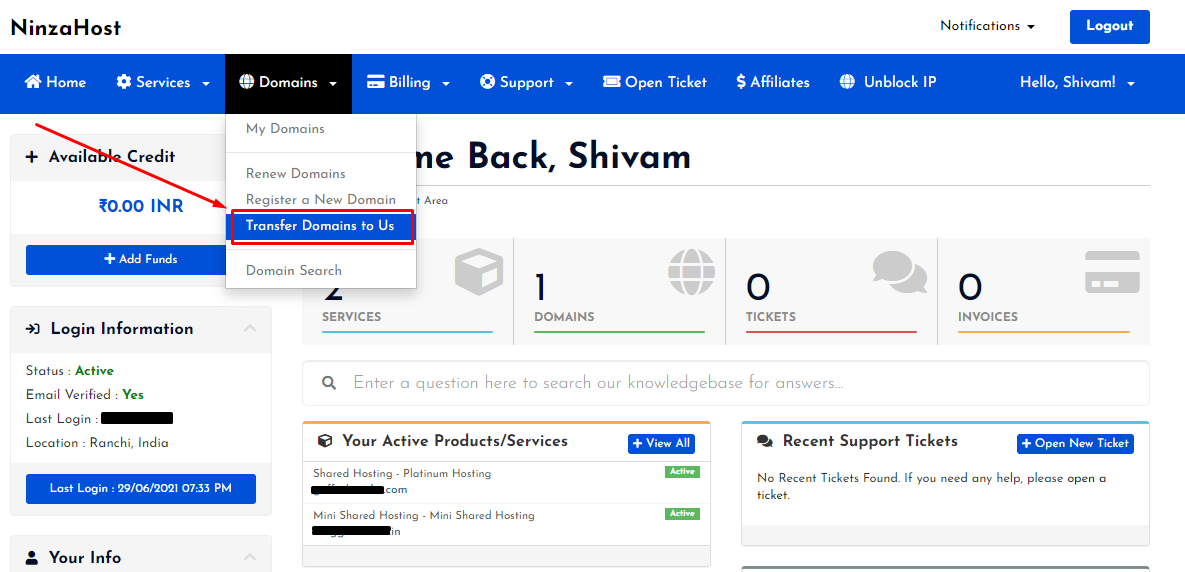
- Click on “Transfer Domain to Us” button under DOMAINS.
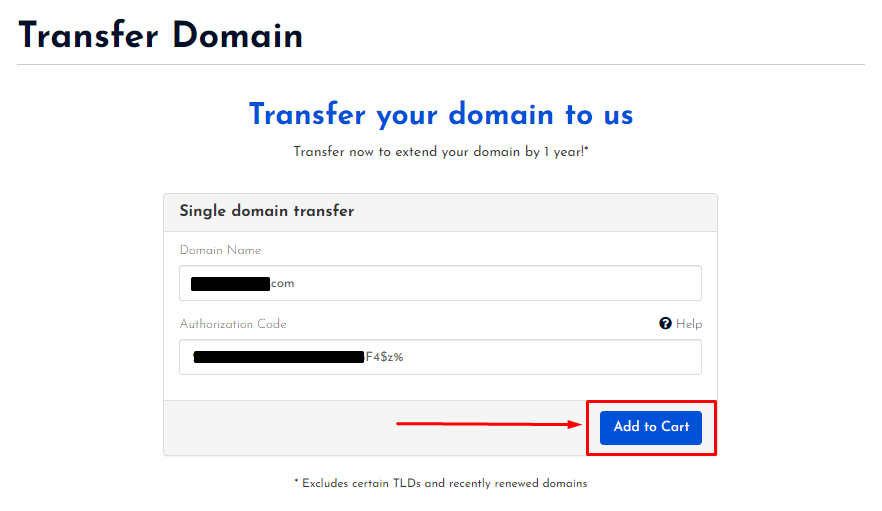
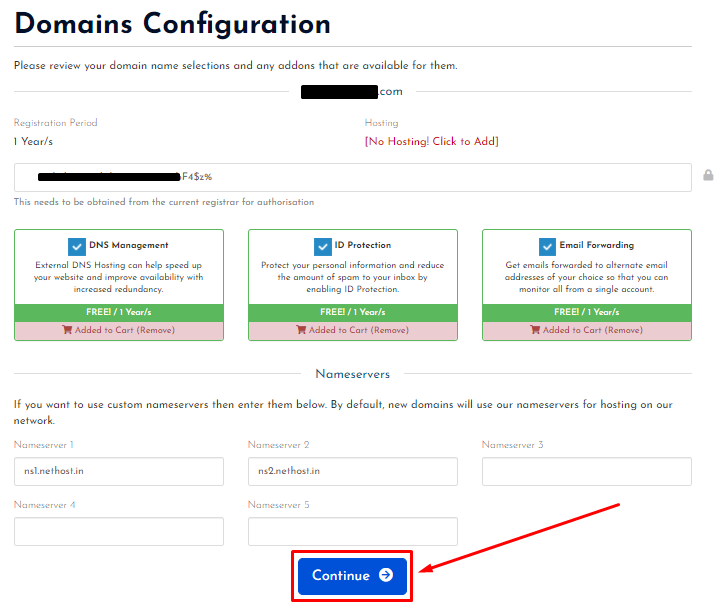
- Now, you need to enter the Domain Name.
- Also, paste the “Authorization Code” in the given field.
- Then, Click on “Add to Cart” button.
- Now, you can add hosting if you want.
- Add some extras as it’s free 🙂 like – DNS Management, ID protection & Email Forwarding.
- Scroll down to bottom.
- Click on “Continue” button.
- Review the product.
- Then, Click on “Checkout” button.

- Fill up all the details like Personal Information, Billing Address & Payment Details.
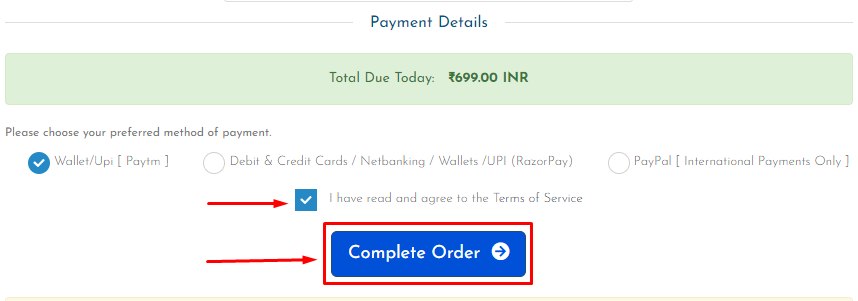
- Choose your Payment Method.
- Click on agree to terms of service checkbox.
- Now, click on “Complete Order” button.
- You will get your invoice shortly.
- It’s time to pay the invoice.
- Simply, click on “Pay with Paytm” button.
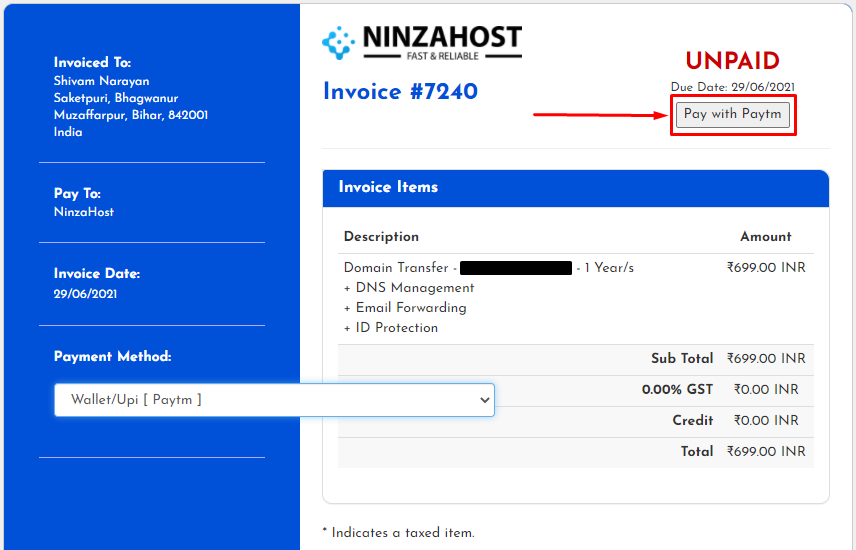
- You will be redirected into payment page.
- Now, complete the payment either with PayTM or UPI.
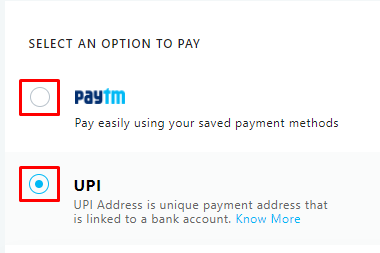
- At last, Click on “PAY” button and pay the amount.
- All Done!
Congrats, your domain name is now successfully transferred to NinzaHost.
If you still have any doubt or have any issue then please let us know in the comment section.


Leave a Comment